

Pan Cake Fun


(optional extras: vanilla or cocoa powder)
Mix all above ingredients really well.And you are ready to use!
My first attempt :-)
Making pancakes is something i enjoy doing with my kids..and i have been helping my seven and five year old make their own pancakes....They have been coming up with interesting shapes i must say. Spooning batter on to the pan and tossing , was fiddly at the beginning, but they are getting the hang of it!

I have been drawing pancake-shapes using a spoon which turns out fine but they do not really turn out neat at times. Until i thought of using a sauce dispenser. Using a sauce dispenser to draw shapes out of pan cake batter is so much fun. It is an interesting way to serve pancakes to your child. Sure to bring a big smile on his/her face.
And the best part is that the whole family can have fun giving it a go. It is certainly a delight to watch their masterpieces taking shape!
And the best part is that the whole family can have fun giving it a go. It is certainly a delight to watch their masterpieces taking shape!
You will need some basics to begin with....

I bought this decor sauce dispenser from Big W. Those pretty cookie cutters from Kmart.
Pouring batter into cookie cutters are great when you want your pancakes thicker. but remember to grease your cookie cutters.
HERE is the recipe for the pancake batter.
So easy to remember........just remember number 2
2 cups Self raising flour
2 tbsp caster sugar
2 eggs
2 cups fresh milk
2 tbsp butter melted
(optional extras: vanilla or cocoa powder)
Mix all above ingredients really well.And you are ready to use!
My first attempt :-)


 |
| My seven year old daughter's master piece! |
 |
| Butterfly |
The big butterfly pancake using was done without using cookie cutters ,drawing using a sauce dispenser .
Second Attempt
This time around I put some thought, and wanted to play with COLORS.
I need extra sauce dispensers, i reused a plastic sauce bottle, and made some chocolate pancake batter by just adding some cocoa powder to my regular pancake batter. It added a nice flavor.

Honey Bee Pan Cakes


Honey Bee Pan Cakes

Set the pancake-pan on low heat.(no need to grease your pan) .
Begin by drawing the outline of the bee using the chocolate batter.
And then wait for a second and then flood in the vanilla batter(yellow colored).
Make Pink,green,yellow and blue batter by adding some food coloring.

Flower Pan Cakes

Draw the outline of the flower using a sauce dispenser,Draw the stem in green. Flood in the vanilla batter to fill in the petals. and done-easy!!

Number Fun
The good side or better looking side which is smooth will always be the face down side when you start to draw a batter. To make numeral pancakes be sure to write them backwards on the pan so that they are right-side up when you flip it over.
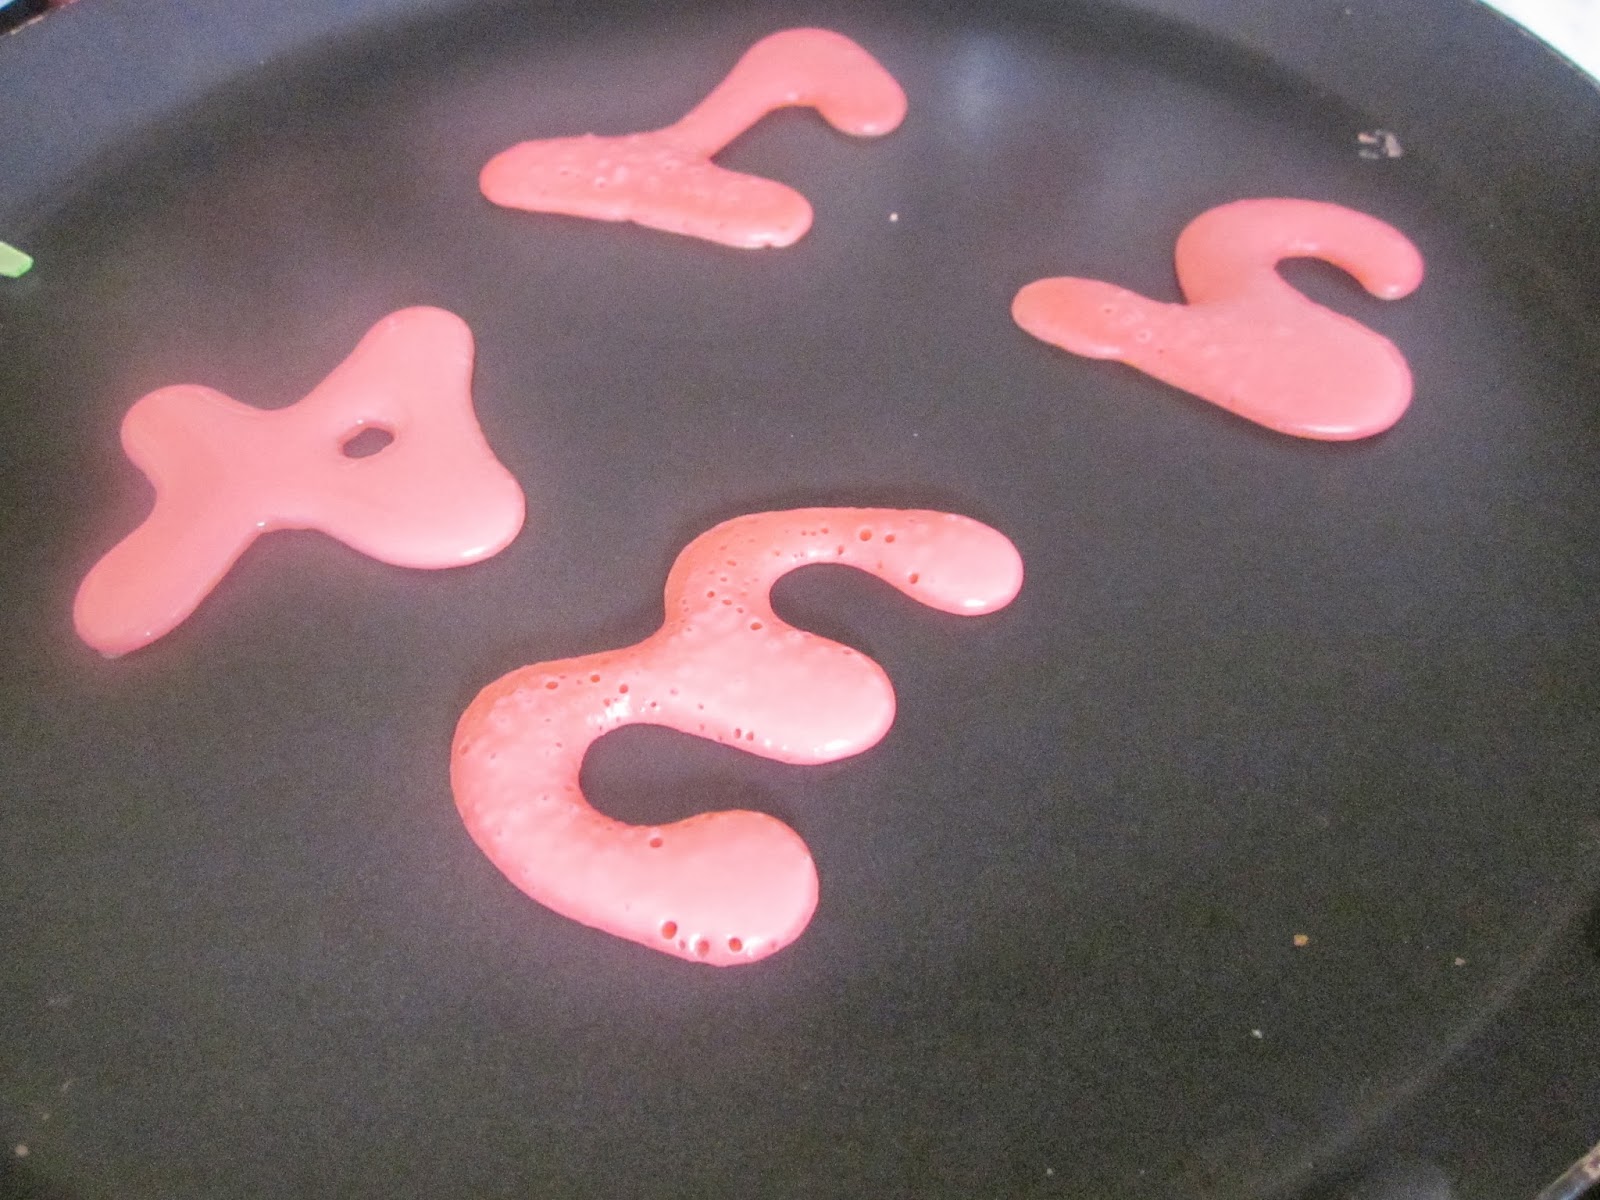 |
| Numerals written backwards |
 |
| they are right-side up when you flip it... |
Many Ways

Get Arty with pancakes.!!!
Great holiday fun for kids...
Hope you enjoyed my tutorials.Please do leave a comment. And do not forget to visit me next week for a very special pancake.
Thanks for visiting!
Comments
Post a Comment